In order to take measurements and photograph snowflakes you'll need some basic materials.
Materials you'll need
Or can also use a piece of dark material on which you can print a grid, e.g., printed from a desk printer or similar felt and photograph with mm ruler next to it?)
NOTE: The key to documenting snowflakes is to keep them cold. For this reason, the snow card is made of metal, or collected on glass, and cold lights like LEDs are used. Do not document snow indoors, or use warm lights as it will cause melting (unless you want to look at the snowflakes melting!).

Microscope phone attachments like the one below (includes LED light for practical purposes), attaches to both iPhones and Androids ,and will uses the 15X Macro lens:

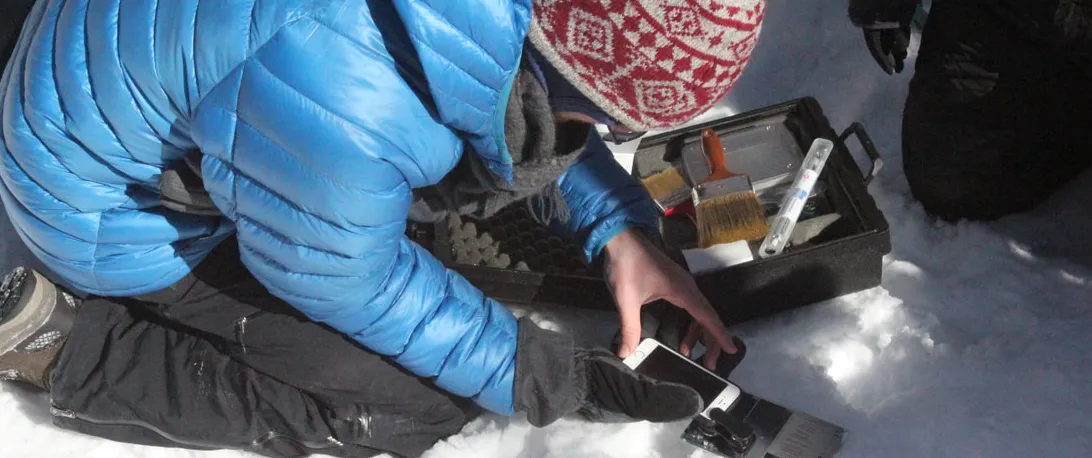
Something to remove the snow from the top of the surface and place it on the grid (e.g., a paint brush or similar), one medium sized and one small
If you don’t know your coordinates, download an app that can tell you your GPS coordinates. For example, you can use this one.
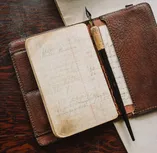
Something to take notes on
Measuring Snowflakes
- Find a spot with recent UNTOUCHED snowfall snowfall, ideally untouched
- Write down the date and time of day
- Using your app, find your GPS coordinates, write them down
- Write down what the weather conditions are, is it windy/calm, what’s the temperature outside? Record any other environmental information you have access to
- Stick the snow measurement card in the snow for a while to ensure that it stays cold.
- Using your medium sized paint brush, brush the surface of the snow onto the snow card
- Using a few hairs from your small sized paint brush, very lightly distribute the snow on the gridded card, trying not to break the snowflakes!
- With your microscope attached to your phone camera, take a photo of an area of the card where the snowflakes are more dispersed. Hold the microscope close to the snowflake with steady hands to get the most in focus photo.
- You can either share immediately or gather all your photos and then share them via social media using the hashtag #xsnow
- For each photo remember to also share the information you wrote down so scientists can take into account the location and conditions of the snowflake.
- Later you can use the zoomed out photos to estimate the average size of particles using the grid, and compare the images of the snow grains with other examples from the web.
- You can also email your photos and information to ([email protected] )
- Feel free to also send a selfie on your field adventures!
*The approach above works best if you plan to walk around and collect data at different locations. If you decide to stay in one place (e.g., your backyard or your favorite spot in the woods!) you might also want to consider the following approach.
- An LED light, like a LED flashlight
- A box, like a shoebox or something similar (is this a good option?)
- A clear sheet of glass or plastic to cover the box
- A transparency with a grid drawn on it, in mm (you can print it at home or get it printed at locations such as Staples, etc.)
- Tape
- Thin permanent marker
- Microscope phone attachment, use 15X Macro lens (same one don’t use the light?)
- Download an app that can tell you your GPS coordinates. This is one app you can use: https://play.google.com/store/apps/details?id=com.pinux.compassplus&hl=en
- Draw a cm/mm grid on the transparency, or purchase premade ones here: (link) or download our PDF Grid and print it on the transparency
- Tape the transparency to the glass or plastic sheet
- Turn on your LED flashlight and put it in the shoe box
- Place the glass/plastic with transparency on top of the box, tape it to the box--now you have a light box!
- Choose a spot outside where snow can land on a surface.
- Write down the date and time of day
- Using your app, find your GPS coordinates, write them down
- Write down what the weather conditions are, is it windy/calm, what’s the temperature outside?
- Place the lightbox in the spot
- Let snow fall on top of the box
Measuring Snowpacks
- Pen or pencil and paper/field notebook
- Ruler
- Camera
- Download an app that can tell you your GPS coordinates. This is one app you can use: https://play.google.com/store/apps/details?id=com.pinux.compassplus&hl=en
- Pick a spot outside where you will perform snow depth measurements. Avoid spots where people have been walking on. Also try to find a place where the snow is even, so not near water or trees where snow might have piled up higher or have thinned out.
- Write down the date and time of day
- Using your app, find your GPS coordinates, write them down
- Write down what the weather conditions are, is it windy/calm, what’s the temperature outside?
- Stick your ruler in the ground, in one firm action. Make sure it is firmly down to the ground.
- Read how far the snow is up the ruler in cm. Write down the measurement
- Leaving your ruler in the ground take a photo of the site. Include the horizon line in your shot so the whole area can be seen along with where the ruler is.
- If you want take a few more measurements by sticking the ruler in the ground within a few yards of the first measurement. Write and photograph each of them. An average of those measurements can be used to know the depth of snow in your area.
- You can either share immediately or gather all your photos and then share them via social media using the hashtag #xsnow2018 For each photo remember to also share the information you wrote down so scientists can take into account the location and conditions of the snowflake.
- You can also email your photos and information to [email protected]
- Feel free to also send a selfie on your field adventures!